
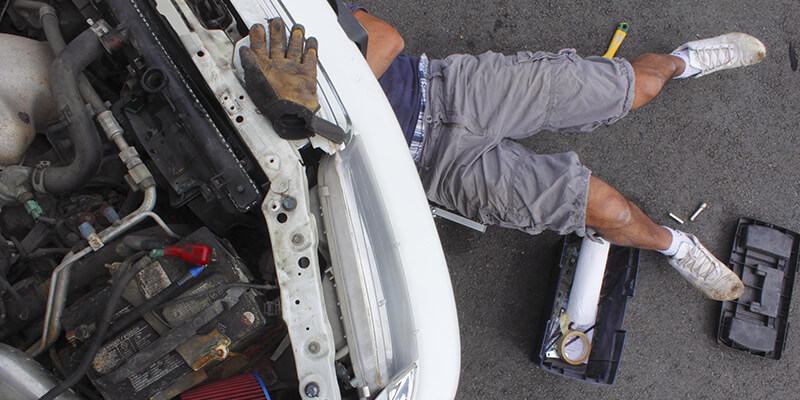
Whether you are a new driver or have been on the roads for years, running into an issue with your vehicle is always a pain. From warning lights popping up on the dashboard to strange noises, there are tonnes of common telltale signs that we dread. However, while problems with your vehicle are never fun, there are a number of car repairs you can do yourself, avoiding the need to take a trip to a mechanic.
7 DIY Car Repairs You Can Do Yourself
Having worked as BMW service centre specialists in Milton Keynes for many years, we are well-versed on the ins and outs of an array of vehicles. While it is always recommended to contact a professional if you are unsure of the severity of a fault, there are many repairs which can be completed through a little DIY. This not only saves money but also enables you to develop a better understanding of how to maintain your vehicle, avoiding future issues. The repairs that we will run through include:
- Changing A Flat Tyre
- Changing The Oil
- Replacing A Bulb
- Fixing A Broken Mirror
- Replacing An Air Filter
- Changing Spark Plugs
- Replacing Wiper Blades
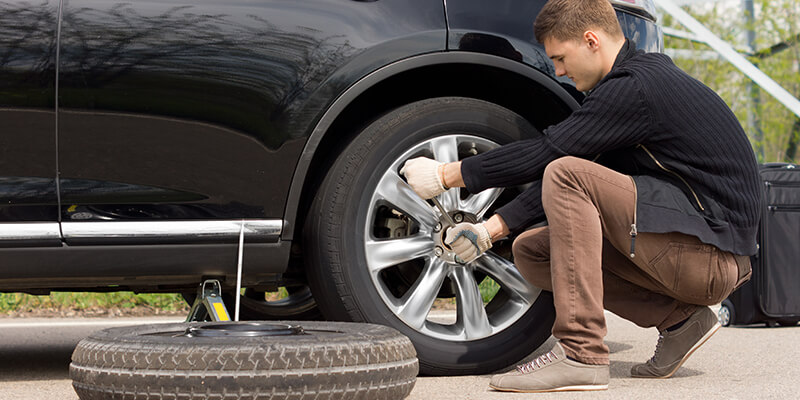
1. Changing A Flat Tyre
As one of the most common car-related issues to encounter, a flat tyre can be incredibly frustrating, not to mention inconvenient. Whether you’re driving along a country road or on a busy dual-carriageway, a blowout can prove incredibly dangerous and jeopardise the safety of driver, passengers and other road users. With this in mind, it is imperative to stay well-informed on how to change a flat tyre, allowing you to resolve the issue as quickly as possible. Changing a flat tyre can be a little daunting at first, which means that it is highly recommended for all drivers to practice from the comfort of their home. Bridgestone Tyre has a fantastic video tutorial on how to do so, along with step-by-step instructions to guide you through the process.
Particularly if you have recently purchased a new car, spend time familiarising yourself with all components, so that you can act promptly and strategically should you experience a blowout. You will also need to ensure that you invest in all of the relevant equipment required to change a tyre and keep this in your boot at all times. There are a number of different causes of a flat tyre, from a puncture caused by a flat tyre to valve system damage, which means that you cannot always anticipate when a problem may arise. Uniroyal Tyres have put together a useful guide to the essential tyre changing equipment, which is most definitely worth a read if you are yet to purchase a kit.
Of course, in order to change a flat tyre, you will need to keep a spare tyre in your vehicle during every journey. RAC’s complete guide to tyre buying states that before purchasing any products, you will need to double-check the measurements printed on the sidewall of your existing tyres. This will ensure that you pick up tyres that fit with your vehicle model. If you have a smaller car with limited boot space, you may want to consider investing in a space-saving tyre. A space-saving tyre is slightly smaller in specifications, which means that it can be stored in vehicles which cannot accommodate conventional sizes. While they are completely safe, they should only be used in emergencies to get you home or to a mechanic. You can find more information on this on Tyremen.
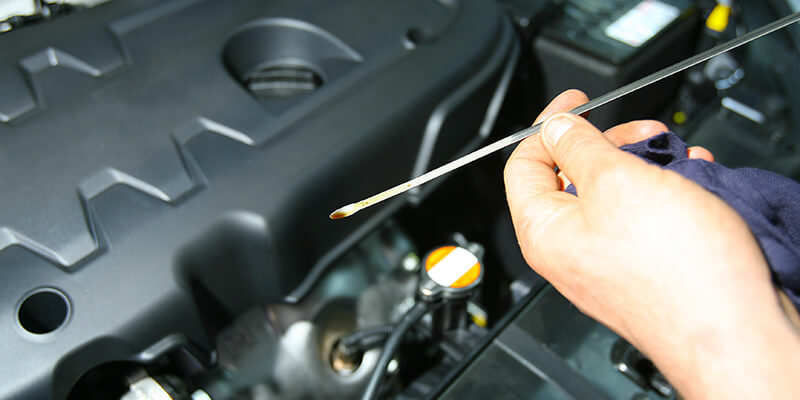
2. Changing The Oil
While changing the oil on your car may not necessarily seem like a ‘repair’, it is vital that you understand the importance of this critical routine maintenance task. Failing to ensure that your oil is regularly topped up risks detrimental damage, but why? Well, every vehicle is designed with tonnes of moving parts, which, when kicked into action, start to heat up. In order to avoid overheating, there needs to be an adequate amount of oil available to keep each part lubricated.
The only real way to spot whether your car oil level is running low is to complete a manual check. How often you need to do this depends on several factors, including how old the engine is and your driving techniques. However, it is advised to schedule time to check the oil level every 3,000 miles to be on the safe side. To do this, simply remove the dipstick from the oil compartment, wipe clean and then dip back into the oil. Take the dipstick out and check the level of visible oil. The oil should always be between the two marks at the bottom of the dipstick, any lower and you will need to top-up.
It is essential to keep a container of engine oil in the house so that you can top-up wherever necessarily. If you allow the oil to run too low, then the engine component will begin to deteriorate. With time, they will start not only to wear out but warp out of place; therefore, decreasing the longevity of your vehicle. For more information on how to minimise car damage and increase your car’s lifespan, take a look at our previous article.
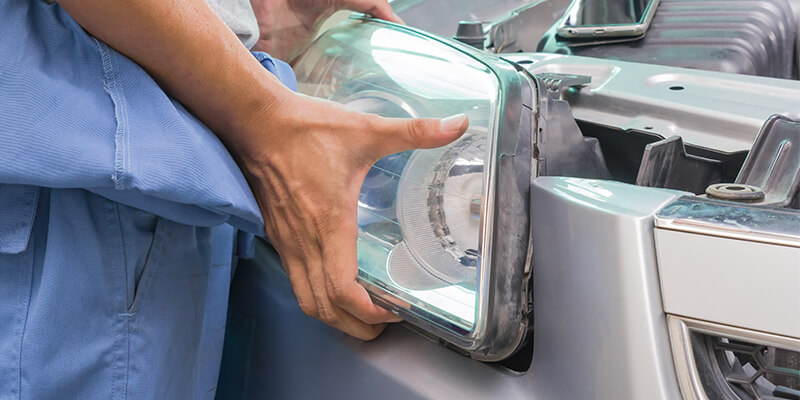
3. Replacing A Bulb
Just like the bulbs used in the home, headlights, brake lights and sidelights can blow with age or when overused. However, luckily, this is a repair task that you can complete independently should you feel confident enough to do so. While this problem is not as severe as the above, it is vital that you schedule a time to replace as soon as possible, particularly if you regularly drive in the dark.
Replacing a bulb on your vehicle is a relatively straightforward task; all that will be required is a new bulb, alcohol wipes, tissues and a screwdriver. If you are unsure on the correct bulbs for your car, Auto Bulbs Direct have a super handy tool which allows you to search for parts based on your registration number. You will then be provided with a full list of part specifications, where products can be added straight to your basket for a low cost. Once you have all of the appropriate equipment, you can then follow the four-step guide featured on Military.com.
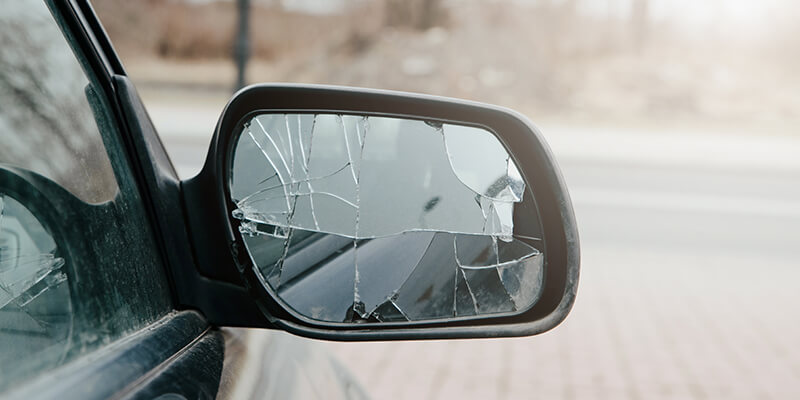
4. Fixing A Broken Mirror
While we have replaced broken mirrors under our mini repairs in Milton Keynes in the past, the task is easier than you think, which means that with a little patience, you can fix the problem from the comfort of your home. Broken mirrors are somewhat rare, and many drivers go through their entire time on the road without having to deal with the issue, which means that it’s unlikely that you will already have the appropriate equipment. There is no need to go out of your way to invest in the tools required until you need them; however, when you do, you will need:
- 4-in-1 Screwdriver
- Hooked Pick
- Panel Removal Lever
- Trim Pad Remover
- Aftermarket Sideview Mirror
- Automotive Spray Paint
We then suggest heading over to Family Handyman for an in-depth guide on how to replace a broken side-view mirror.
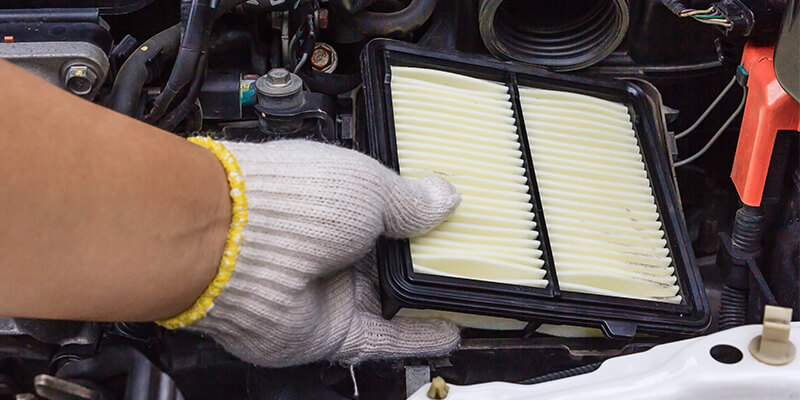
5. Replacing An Air Filter
It is recommended to change your air filter every 12 months or when you complete 11,000 to 12,000 miles – this will be based on which of the two you reach first. With experience, this task will take no longer than ten minutes to complete and comes alongside a wealth of benefits. Not only will regularly changing your air filters increase fuel efficiency but will also prolong the life of your engine and reduce emissions.
Changing the air filter couldn’t be more straightforward. First things first, you’ll need to open the bonnet of the car and identify the air filter. It’s usually in a black rectangular box. If you can’t see it, take a look in your vehicle handbook for help. When you find the filter, analyse how the filter is fitted. We advise that you take a picture of how it is fitted so you know exactly how to put it back when complete. When you’re ready, simply remove the old filter and replace it with the new one exactly as the old one fitted. Make sure you add the fixing clips back in the correct position to secure it.
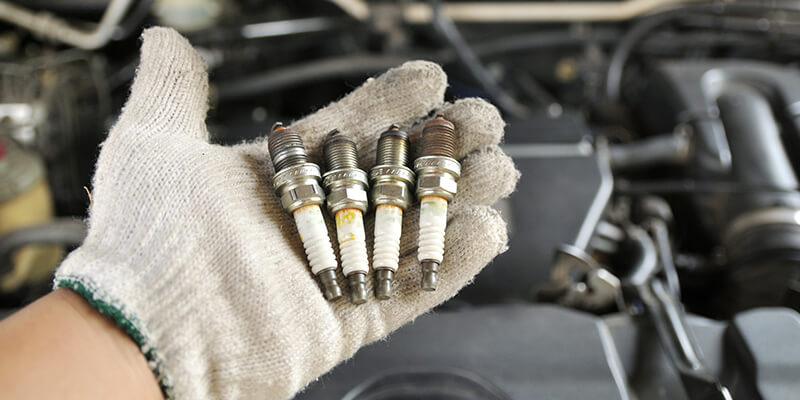
6. Changing Spark Plugs
Spark plugs play a pivotal role in the ignition process; they are fitted into the combustion engine’s cylinder head and deliver a spark to the combustion chamber. If there is a fault or a damaged plug, your vehicle may misfire, which can prove increasingly dangerous when attempting to drive. This can be spotted through several signs such as loss of engine spark, intermittent misfires and abnormal vibrations.
If you notice any of the above warning signs, you will need to take a look at the inside of your vehicle. Start by open up your bonnet and identify the plugs. They’re usually attached to thick rubber wires and may be located underneath any coil packs you have fitted. Your vehicle will have four, six or eight spark plugs – this will vary from car to car and is based on the number of cylinders your vehicle has. If you have never replaced the spark plugs before, then make sure that you allow a minimum of 30 minutes to get things correct as the new spark plugs will need to be installed in a specific order.
- Remove the wire attached to the first spark plug (DO NOT remove any more at this stage)
- Using a spark plug socket and ratchet extension, remove the first plug.
- Now you can begin to replace the old plug with the new. Install the spark plug firstly by screwing it into position by hand and then tighten it with a wrench. Remember to be cautious and do not over tighten the plugs.
- Re-attach the wiring to the spark plug and move onto the next one.
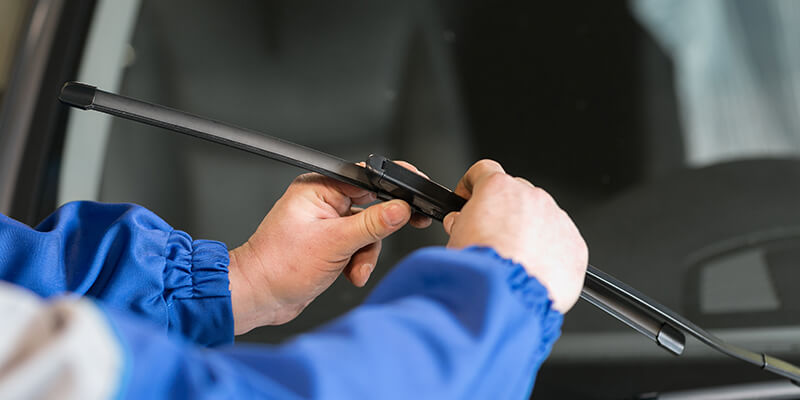
7. Replacing Wiper Blades
According to the GOV.UK website, faulty windscreen wipers are one of the top three causes for an MOT fail. If your current windscreen wipers are unable to effectively clear water or leave untouched areas, you will fail your test. This also becomes incredibly dangerous when driving in adverse weather conditions as your vision becomes limited, and you risk a collision. For more information on the most common causes of an accident, take a look at our previous article.
If you spot that your wiper blades are no longer serving their purpose, then replacement is an easy, low-cost task to complete independently. There will be no tools required, and you can order new blades from WiperBlades.co.uk, who allow you to find the products you need based on your registration.
When you are ready for replacement, begin by lift the blade gently and hold down the tab underneath to release it. Gently slide the old blade off and wipe the arm with a damp cloth. Lastly, fit the new blades and make sure that they’re secure. It is always recommended to test the new wiper blades before setting off, which can be done by cleaning the windscreen.
Keep Your Vehicle In Full Working Order
A car is likely to be one of your most significant investments, which means it is vital to keep all components in full working order. In spending time regularly maintaining your vehicles and carrying out any minor repairs as soon as they arise, you can avoid problems worsening. Lifehack has put together a helpful guide with more basic car repairs which every driver should aim to familiarise themselves with.
Along with regular maintenance, another way to spot growing issues with your vehicle is to take advantage of an annual service. While an annual service is not a legal requirement, it does enable you to check the health of components such as the suspension and steering, which is not covered in an MOT. For more information on the importance of getting your car serviced, take a look at AA. Alternatively, if you are planning a Porsche service in Milton Keynes or any other German vehicle, do not hesitate to contact our team!